


How to Detail a Car at Home: A Beginner’s Guide
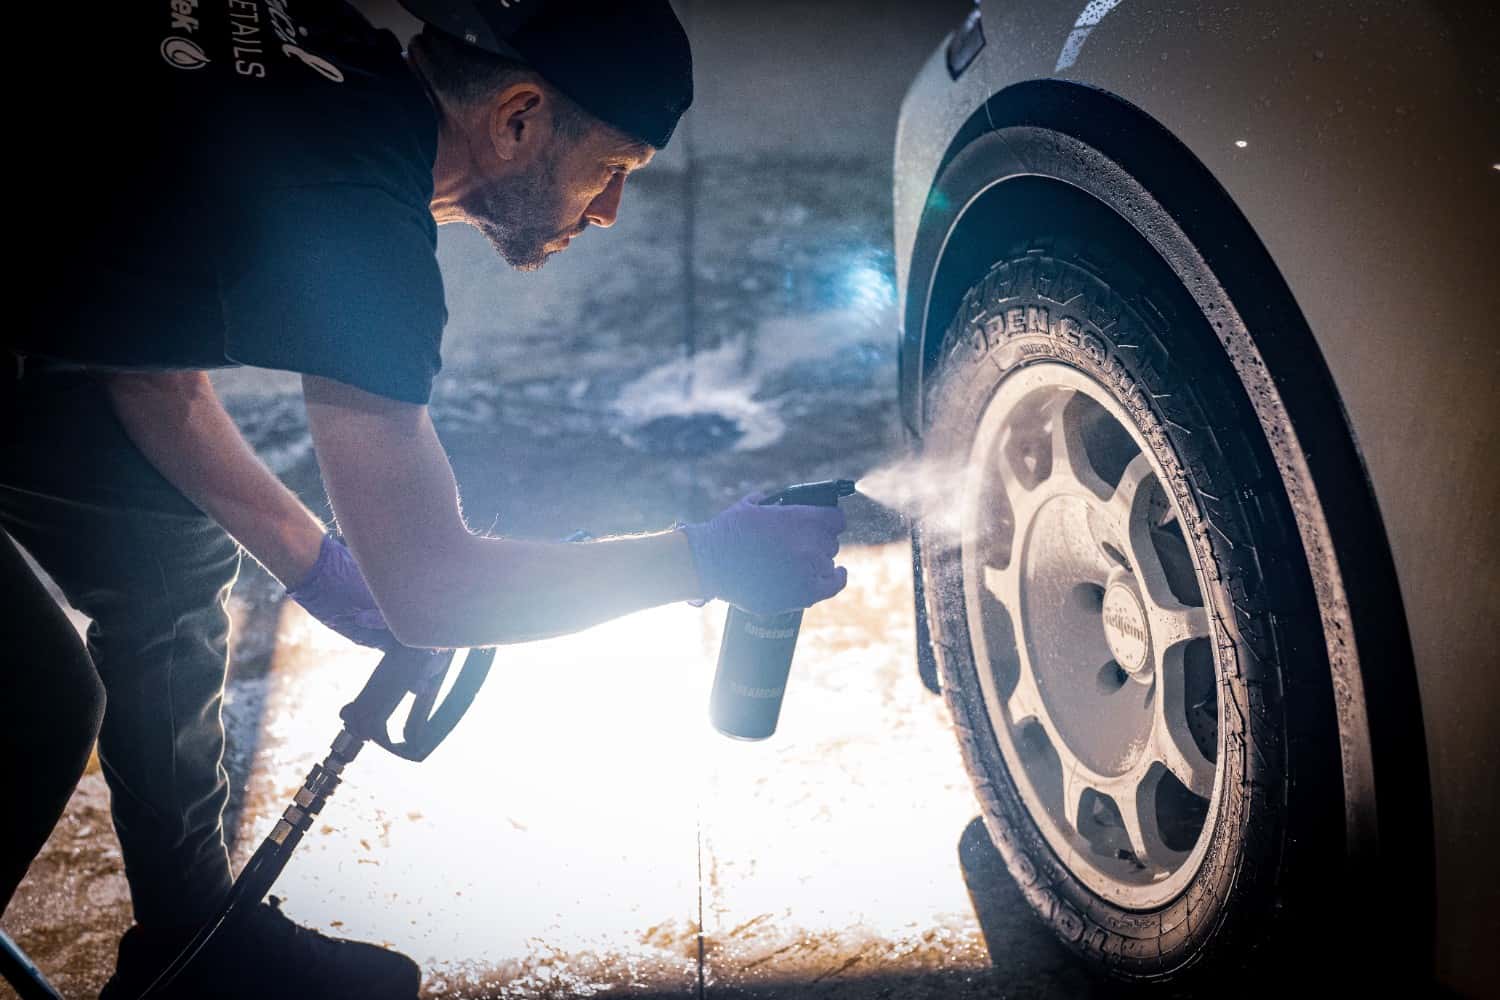
You just ran through the automatic car wash, but the air vents still blow dust in your face and the cup holders smell like last week’s french fries. A quick wash only rinses surface dirt, while learning how to detail a car restores every crevice inside and out. You do not need expensive machines or pro-grade setups to get outstanding results in your driveway.
With basic, affordable supplies and a smart order of operations, any beginner can protect their paint and bring back that fresh interior feel. Our James Hodge Hyundai service team built this guide using tested 2026 detailing practices to save you time, effort, and money.
Here is the exact step-by-step order, the gear you actually need, and the costly rookie mistakes to avoid.
Quick Summary: How to Detail a Car in 11 Steps
To learn how to detail a car efficiently, clean the interior first, tackle the wheels and tires, and wash the exterior using the two-bucket method. Dry the vehicle completely, decontaminate rough paint with a clay bar if needed, apply a hand polish, protect the clear coat with wax, and finish with trim dressing and streak-free glass.
| Detail | Typical Beginner Range |
| Time | 3 to 5 hours |
| DIY Cost | $100 to $150 for basic supplies |
| Difficulty | Beginner-friendly (no power tools required) |
Key Takeaways
- Start with the interior so kicked-up cabin dust never settles onto freshly cleaned paint.
- Practice safe DIY car detailing by using the two-bucket wash method with grit guards.
- Never use household dish soap because it strips protective clear coat oils and wax.
- Park in the shade; direct sunlight bakes soap and water spots onto hot panels.
- Seal the finish with quality car wax or synthetic sealant to block harsh road grime.
Car Detailing Basics: What Is Detailing and Why Do It Yourself?
Mastering car detailing basics means going far beyond a quick surface wash. An automatic wash often misses hidden dirt, but learning how to detail cars cleans out trapped grime, refreshes the interior, and keeps your exterior paint protected.
| Feature | Car Wash | DIY Detailing |
| Depth | Surface rinse of exterior paint | Deep sanitization, paint decontamination, and protection |
| Time | 5 to 10 minutes | 3 to 5 hours |
| Tools | Automated spinning brushes or basic wand | Microfiber towels, dedicated brushes, two buckets |
| Results | Removes loose road dirt | Restores finish, revives interior, and adds long-term sealants |
Tackling DIY car detailing protects your wallet, too. According to Kelley Blue Book, maintaining a vehicle in excellent condition versus fair condition can boost resale or trade-in value by $1,000 to $2,000. Consumer Reports also notes regular cleaning removes road salt and acidic environmental fallout before permanent corrosion sets in.
How to Start Detailing: Tools and Products You Need
To master how to start detailing, gather surface-safe essentials that clean without scratching delicate automotive finishes. A proper beginner kit prioritizes gentle chemicals, dedicated applicators, and high-pile microfiber goods to lift dirt safely away from clear coat, glass, and cabin plastics without breaking the bank.
| Item | Why You Need It | Budget Pick |
| Two 5-gallon buckets with grit guards | Isolates trapped dirt from the wash mitt | Hardware store utility buckets with generic inserts |
| pH-neutral car wash soap | Lifts road film without stripping factory wax | Concentrated car wash shampoo |
| Microfiber wash mitt | Soft fibers trap abrasive road particles safely | Chenille microfiber wash mitt |
| Microfiber drying towels | Soaks up water fast without surface marring | High-GSM twisted-loop drying towel |
| Soft detailing brushes | Cleans air vents, emblems, and tight seams | Boar hair or soft synthetic brush pack |
| Wheel cleaner | Dissolves stubborn brake dust safely | Acid-free, color-changing wheel spray |
| Vacuum with attachments | Pulls grit from carpeting and seat rails | Standard home wet/dry shop vac |
| Interior all-purpose cleaner | Cleans vinyl, dash plastics, and door panels | Mild, dilution-ready automotive interior cleaner |
| Glass cleaner (ammonia-free) | Leaves streak-free clarity safe for tint | Automotive non-ammonia glass cleaner |
| Clay bar and lubricant | Pulls embedded grit out of exterior paint | Mild synthetic clay bar with dedicated clay lube |
| Wax or synthetic sealant | Seals clear coat from UV fading and road salt | Easy wipe-on carnauba wax or liquid polymer |
| Foam applicator pads | Spreads waxes and dressings evenly | Multi-pack foam hand applicator rounds |
| Tire dressing | Restores deep satin black and fights rubber dry rot | Water-based tire gel or spray |
Starter Budget Tiers
- Basic: $60 to $80 for absolute essentials to complete your first clean.
- Better: $100 to $150 to add clay decontamination and dedicated wheel products.
- Advanced: $180 to $250 for premium sealants, dual drying towels, and brush sets.
Buy multi-pack microfiber towels in bulk and color-code them. Reserve your plush, pristine towels strictly for paint, separate medium towels for the interior, use waffle-weave towels for glass, and banish grimy towels to wheel duties.
Before You Start: Setup and the Right Order of Work
Executing your car detailing step by step requires an organized workspace before spraying any water. Park on level ground in full shade on cool panels, ideally when ambient temperatures are between 55°F and 80°F with low wind. Stage your hose, buckets, vacuum, and labeled microfiber towels within easy reach so you never search for tools mid-wash.
We recommend tackling the interior first. Vacuuming and wiping dash vents blows dust out of cabin seals, which ruins freshly dried paint if done afterward. Some commercial detailers wash the exterior first simply to let panels drip-dry while they vacuum, but driveway detailers get cleaner results doing the cabin first.
- Interior prep and trash removal
- Interior dusting and vacuuming
- Cabin surfaces and seat cleaning
- Wheels, tires, and wheel wells
- Exterior two-bucket wash
- Complete vehicle drying
- Paint clay bar decontamination
- Hand polishing (if needed)
- Clear coat wax or synthetic sealant
- Tire dressing and exterior plastic trim
- Glass cleaning and final inspection
Wash over grass or gravel to filter runoff naturally, or use a designated wash pad following EPA clean water recommendations.
Interior Car Detailing: How to Detail Your Own Car Interior
When you learn how to detail your own car interior, start by tossing out trash, dusting the vents, and vacuuming from top to bottom. Use mild cleaners and clean microfiber towels so you can wipe down cabin surfaces without risking water damage around buttons or screens.
Empty, Declutter, and Dust
- Toss trash, clear cup holders, and empty door pockets.
- Agitate dust inside AC vents, console crevices, and dashboard seams using a soft detailing brush.
- Blow trapped grit out of tight seams using a can of compressed air if you have one handy.
Vacuum From Top to Bottom
- Start high at the headliner and dash top, then work down over seats, console bases, and floor carpets.
- Slide front seats completely forward and then backward to expose hidden pet hair and dried kid snack crumbs.
- Remove floor mats, shake them outside, scrub with mild soap, and dry completely before reinstalling to prevent mold.
Clean Hard Surfaces
- Spray mild interior cleaner onto a clean microfiber towel, never directly onto dash panels or buttons.
- Wipe the steering wheel, console trim, and door panels gently without over-saturating switches.
- Wipe touchscreens with a dry or barely damp microfiber cloth; never use chemical cleaners.
Clean Seats by Material
- Cloth: Mist fabric cleaner lightly and agitate with a soft brush; avoid soaking to protect occupant sensors and side airbags.
- Vinyl or Leatherette: Wipe clean with a damp microfiber towel and mild interior cleaner, then buff dry.
- Leather: Clean gently with pH-balanced leather cleaner, take care not to clog perforated cooling holes, and finish with a non-greasy conditioner.
Interior Finish
Clean the inside glass last using an ammonia-free cleaner. Never apply slick dressings or silicone protectants to pedals, floor mats, or the steering wheel rim to avoid dangerous slipping.
| Surface | Cleaner Type | Avoid |
| Touchscreen & Gauges | Dry or barely damp microfiber cloth | Chemical sprays, alcohol wipes, paper towels |
| Plastics & Vinyl | Mild, pH-balanced interior cleaner | Household bleach, ammonia, greasy silicone sprays |
| Upholstery & Fabric | Low-moisture fabric cleaner foam | Soaking water, harsh degreasers |
| Pedals & Controls | Damp microfiber with warm water only | Glossy interior dressings, slick protectants |
How Do You Clean Wheels and Tires First?
Clean wheels and tires before washing the vehicle body because they collect abrasive road grime, corrosive brake dust, and oily road film. Using dedicated wheel brushes and separate buckets prevents transferring sharp metallic particles onto your delicate exterior paintwork, keeping your clear coat safe from accidental swirl marks.
- Spray wheels with water to cool them down; never spray chemicals onto hot alloy or steel wheels.
- Apply a dedicated, pH-balanced wheel cleaner formulated specifically for your wheel finish (painted, alloy, or clear-coated).
- Let the product dwell according to the label directions to dissolve brake dust without drying out.
- Agitate wheel faces, barrel recesses, and lug nuts with a soft wheel brush.
- Scrub tire sidewalls firmly using a stiff-bristle tire brush and an all-purpose rubber cleaner.
- Rinse the wheel, barrel, and tire thoroughly with a strong stream of clean water.
Leave the rubber bare for now. You will apply your protective tire dressing as a finishing touch during the exterior styling phase.
Exterior Car Detailing: Wash and Dry Without Scratches
Safe exterior car detailing relies on a thorough pre-rinse, the two-bucket wash technique, and straight-line wiping motions to eliminate grit without scratching a clear coat. Working top to bottom in full shade prevents soapy residue and mineral-heavy water spots from drying directly onto warm body panels.
Pre-rinse: Spray the vehicle from top to bottom with cool water or an optional foaming pre-soak to flush away loose grit, crusty road salt after winter driving, or heavy spring pollen.
- Wash using two buckets: Fill one bucket with sudsy, pH-neutral car soap and the second with clean rinse water (both fitted with grit guards).
- Clean panel by panel: Dunk your microfiber wash mitt into the soapy bucket, wash one upper panel using light, straight-line strokes, and dunk the mitt into the rinse bucket to drop trapped dirt before reloading with soap.
- Dry immediately: Glide a plush, dedicated microfiber drying towel across the paint using the flat blot-and-drag method, working from the roof down to prevent standing water spots.
Wash Do / Don’t
- Do: Use concentrated, pH-neutral automotive soap that lubricates paintwork.
- Do: Wash and dry panels in gentle, overlapping straight lines.
- Do: Rinse the mitt frequently in the clean water bucket.
- Don’t: Wash with household dish soap, which strips protective wax and dries out rubber trim.
- Don’t: Scrub panels in circular motions that cause spider-web swirl marks.
- Don’t: Wash hot paint under direct midday sunlight.
Clay, Polish and Wax: What Beginners Should Actually Do
Beginners should only clay bar if the paint feels gritty after washing, apply hand polish selectively to dull spots, and seal the paint with wax or synthetic sealant. This three-stage decontamination and protection process locks in a glossy finish while shielding clear coat from harsh outdoor elements.
Do You Need a Clay Bar?
Perform the plastic sandwich bag test. Slide your clean hand inside a sandwich bag and glide it across freshly washed, dry paint. If the panel feels like coarse sandpaper, you need a clay bar. Spray dedicated clay lubricant generously, gently glide a flattened synthetic clay disc in straight lines across the wet panel, and wipe off the residue with clean microfiber.
Polish or Skip It?
Polishing uses fine abrasives to level clear coat and eliminate micro-scratches. Beginners should skip machine rotary polishers entirely to avoid burning paint. If your hood looks hazy, work a dab of finishing polish into a small test area by hand using a foam pad and moderate pressure, then buff clean.
Wax, Sealant, or Ceramic?
| Protection | Typical Longevity | Effort Level |
| Carnauba Car Wax | 1 to 3 months | Easy hand application, deep warm glow |
| Synthetic Paint Sealant | 4 to 6 months | Moderate wipe-on, excellent synthetic durability |
| Ceramic Spray Coating | 6 to 12 months | Easy spray-on, high water beading |
Apply your chosen wax or sealant in thin, even layers. Let the formula haze according to the manufacturer label, then gently buff the surface to a high shine using a fresh microfiber cloth. According to Consumer Reports, applying clear coat protection shields paint against acidic bird droppings, sun-induced UV oxidation, and hard-water staining.
Finishing Touches: Glass, Trim and Tire Shine
Clean exterior glass, dress dull trim, and apply tire shine last to eliminate residual overspray and give your vehicle a crisp, balanced finish.
- Clean all exterior and interior glass last using an automotive ammonia-free cleaner.
- Use the two-towel technique: wipe down the glass with one damp microfiber towel, then immediately buff clear with a dry waffle-weave towel.
- Roll windows down an inch to clean the hidden road grime along the top edge before finishing the main pane.
- Apply water-based dressing lightly to exterior black plastics and tire sidewalls with a foam applicator to avoid oily sling.
- Complete a slow final walk-around with a fresh microfiber cloth to catch any stray wax smudges or missed water drips.
Common Detailing Mistakes and Car Detailing Advice From Our Team
The best car detailing advice is learning what not to do before touching your vehicle with a wash mitt or cleaning spray. Skipping common amateur habits prevents permanent swirl marks, etched paint, and ruined cabin electronics.
- Using household dish soap that strips factory clear coat oils and dries rubber gaskets.
- Detailing hot panels under direct sunlight, which bakes chemical spots into paint.
- Scrubbing body panels in circular patterns instead of gentle straight lines.
- Washing with a single bucket that grinds trapped dirt right back into the finish.
- Reusing dirty microfiber towels or wiping paint with a towel dropped on the ground.
- Soaking upholstery and carpets, which risks mildew and damages hidden seat wiring.
Our service team often sees deep clear coat scratching caused by single-bucket washes with contaminated sponges. In our experience, spending ten dollars on grit guards and clean microfiber towels saves you hundreds in professional paint correction down the road.
How Often Should You Detail Your Car, and What Does It Cost?
Regular maintenance keeps DIY car detailing fast and affordable while preventing permanent wear. Many detailers suggest a basic exterior wash every two weeks, a light interior dust and vacuum once a month, and a comprehensive deep detail every four to six months to reapply protective paint sealants.
According to HomeGuide, hiring a professional full-service detailer in 2026 typically costs between $150 and $500 or more, depending on vehicle size and paint condition. Doing the labor yourself saves hundreds while producing comparable results.
| Option | Typical Cost | Time | Best For |
| DIY Starter Kit | $60 to $100 | 3 to 4 hours | Beginners needing basic buckets, car soap, and microfiber towels |
| DIY Full Kit | $150 to $220 | 4 to 5 hours | Enthusiasts adding clay bars, hand polish, and synthetic sealants |
| Professional Detail | $150 to $500+ (HomeGuide) | 4 to 8 hours | Drivers wanting hands-off convenience or advanced machine correction |
Detailing a Hyundai: Paint, Interior Surfaces and Screens
For a Hyundai, follow the same detailing order, but check your owner’s manual for cleaning guidance, go gentle on screens and glossy black trim, and use soft towels on clear coat. Taking extra care around modern digital instrument clusters and exterior accents preserves your vehicle’s fit and finish for years to come.
| Hyundai Area | Detailing Tip | What to Avoid |
| Clear Coat Paint | Use plush microfiber wash mitts and straight-line strokes | Automatic car wash brushes and abrasive rotary pads |
| Gloss Black Interior Trim | Dust with ultra-soft detailing brushes and light air | Dry wiping with rough terrycloth or paper towels |
| Touchscreen & Gauge Cluster | Wipe gently using a dry, clean microfiber cloth | Ammonia-based cleaners, alcohol wipes, and wet sprays |
| Leatherette or Cloth Seats | Mist mild upholstery cleaner lightly onto towels | Soaking seat cushions near side airbags and sensors |
| All-Weather Floor Liners | Hose off with mild soap and water, then air-dry | Slick silicone protectants that create slip hazards |
Our team often sees new owners accidentally scratch piano black trim by rubbing it with dry napkins or shirts. Hyundai provides model-specific cleaning guidance through the official Hyundai Owner Resources portal and printed owner’s manual. Genuine accessories like fitted all-weather floor liners also keep cabin carpets spotless between washes, and our service advisors are always happy to answer surface care questions.
How We Put This Guide Together
Our James Hodge Hyundai service department compiled these recommendations using 2026 automotive detailing standards, manufacturer guidelines, and hands-on maintenance experience. Always consult your specific vehicle owner’s manual as the ultimate authority on materials and factory care requirements.
Final Verdict: How to Detail a Car at Home
Learning how to detail a car at home comes down to using gentle supplies, working patiently, and following a logical order. You can easily match professional results in your driveway while saving money and preserving long-term vehicle value.
- Clean the interior first so cabin dust never settles onto freshly washed paint.
- Wash the exterior using two buckets and plush microfiber towels to eliminate swirl marks.
- Seal the clear coat with a durable wax or synthetic sealant to block UV rays and road grime.
Have questions about caring for your vehicle or choosing the right all-weather accessories? Reach out to the James Hodge Hyundai service team or stop by to chat with our advisors.
Frequently Asked Questions
How do I detail a car at home for beginners?
Start by cleaning the interior cabin, scrubbing the wheels, and washing exterior panels using two buckets with grit guards. Dry with microfiber towels, clay rough paint if needed, and apply protective car wax.
Should I detail the interior or exterior first?
Detail the interior first so dust agitated from vents, upholstery, and carpets does not land on clean exterior paint. Professional shops sometimes wash first to let panels drip-dry, but driveway detailers get cleaner results starting inside.
How long does it take to detail a car yourself?
A complete beginner DIY detail typically takes 3.5 to 5.5 hours. Working through the interior takes about two hours, while wheels, two-bucket washing, drying, and applying paint protection take roughly two to three hours.
How often should you detail your car?
Wash the exterior every two weeks, vacuum and dust the cabin monthly, and perform a deep detail every four to six months. Reapplying wax or sealant seasonally protects paint against harsh weather and UV damage.
How much does DIY car detailing cost compared with a professional detail?
A beginner DIY kit costs roughly $60 to $100 for reusable supplies. Professional full-service detailing in 2026 typically ranges from $150 to $500 or more per visit according to HomeGuide, saving you significant money over time.
Can I detail my car in direct sunlight?
No, never detail hot vehicle panels under direct sunlight. Solar heat quickly evaporates water and cleaning chemicals, baking stubborn mineral spots, soapy streaks, and hazy wax residues directly onto your clear coat before you can rinse.
What’s the difference between polishing and waxing?
Polishing uses microscopic abrasives to remove a thin clear coat layer and smooth out fine scratches. Waxing contains no abrasives; it places a sacrificial protective coat over the paint to block UV rays and repel water.
Is it okay to use dish soap to wash a car?
No, never wash an automobile with household dish soap. Dish detergent is formulated to strip grease, so it dissolves protective paint wax, dries out exterior rubber trim, and accelerates clear coat oxidation over time.
Disclaimer: This guide is intended for informational and general vehicle care purposes only. Always test any cleaning chemical or detailing product on an inconspicuous, hidden spot before full application. To prevent surface damage or voiding warranty coverage, always consult your official vehicle owner’s manual for model-specific care instructions and safety guidelines. James Hodge Hyundai assumes no liability for accidental damage resulting from improper product use or application techniques.
0 comment(s) so far on How to Detail a Car at Home: A Beginner’s Guide