


Car Maintenance Checklist: What to Check Every Month
You walk out to your car on a brisk morning, twist the key or push the start button, and get nothing but a dead, clicking battery. Most drivers only pop the hood after a warning light flashes or an odd grinding noise turns heads in a parking lot.
Following a basic monthly car maintenance checklist stops those sudden headaches before they leave you stranded. Setting aside just fifteen to twenty minutes once a month gives you an honest look at your vehicle’s health.
You do not need mechanical certification or a toolbox full of specialty gear to do it. Catching low oil levels, worn rubber, or cracked wiper blades early keeps repair costs low and your daily drive predictable.
Quick Summary: A basic monthly vehicle check covers five core items: engine oil level, cold tire pressure, tire tread depth, windshield washer fluid, and exterior lights. The entire routine takes 15 to 20 minutes in your driveway using simple hand tools. Treat your owner’s manual as the final authority for exact fluid types and tire specs. Book a visit with a service center if you find rapid fluid loss, uneven tire wear, or illuminated dashboard warnings.
Key Takeaways
- Set aside 15 to 20 minutes monthly to inspect oil, tires, washer fluid, wipers, and lights.
- Inspect tire pressure cold using the driver’s door-jamb placard, not the maximum number on the tire sidewall.
- Replace tires at 2/32-inch tread depth, using a penny or depth gauge to check groove wear.
- Handle fluid top-offs and visual bulb checks at home, leaving brake inspections and leaks to technicians.
- Rely on your owner’s manual as the definitive guide for factory specifications, intervals, and fluid ratings.
- Schedule professional service immediately if warning lights stay lit or fluids drop quickly between inspections.
Monthly Car Maintenance Checklist: 12 Things to Check
A dependable car maintenance checklist covers twelve core inspection points each month: tire pressure, tread wear, oil, coolant, brake fluid, washer fluid, wipers, exterior bulbs, battery terminals, engine belts, dashboard warnings, and driveway leaks. Completing these visual checks takes under twenty minutes and catches small mechanical problems before they cause breakdowns.
| Check | What to look for | How long it takes | DIY or service center | Warning sign |
| Tire Pressure | Cold PSI matching the door-jamb sticker | 3 mins | DIY | Low tire pressure warning light, soft sidewall |
| Tire Tread & Sidewalls | Minimum 2/32-inch groove depth, no bulges or cracks | 2 mins | DIY (Replacement at Service Center) | Lincoln’s head visible on penny test, vibrations |
| Engine Oil Level | Clean amber/brown fluid sitting between dipstick hash marks | 2 mins | DIY (Oil Change at Service Center) | Dark gritty oil, oil pressure light, ticking valvetrain |
| Coolant Level | Translucent expansion tank level between MIN and MAX marks | 1 min | DIY | Overheating gauge, sweet syrup smell, white residue |
| Brake Fluid Level | Clear to light-amber liquid sitting near the MAX fill line | 1 min | DIY (Flush at Service Center) | Dark murky fluid, spongy brake pedal, ABS light |
| Windshield Washer Fluid | Reservoir filled with seasonal wash solution | 1 min | DIY | Dry pump hum, weak spray, smeary windshield |
| Wiper Blades | Flexible rubber edge free of tears, cracks, or split edges | 1 min | DIY | Chatter across glass, rubber squealing, missed streaks |
| Exterior Lights | Headlights, brake lamps, blinkers, and reverse lights firing | 2 mins | DIY (Electrical at Service Center) | Fast-blinking turn indicator, dim bulb, dark socket |
| Battery Terminals & Age | Tight, clean cable clamps free of powdery white or blue buildup | 2 mins | DIY (Testing/Replacement at Service Center) | Sluggish engine crank, swelling battery case, dim lights |
| Belts & Hoses | Serpentine belt ribs free of deep cracks; hoses firm without bulges | 2 mins | DIY (Replacement at Service Center) | High-pitched belt squeal, soft sponge-like radiator hoses |
| Dashboard Warning Lights | Instrument cluster clears all icons right after engine startup | 1 min | Service Center | Persistent Check Engine, ABS, or battery warning lamp |
| Driveway Leaks | Clean ground surface under the engine and transmission bays | 1 min | Service Center | Wet puddles of red, dark brown, or bright green liquid |
Always verify fluid capacities, oil grades, and recommended cold inflation figures directly inside your vehicle owner’s manual before adding fluids or setting pressures.
Tires: The Check That Matters Most
Your tires are the only four contact patches between your car and the pavement. Checking them monthly keeps your fuel economy steady and protects your family from blowouts.
Tire Pressure
Always check tire pressure when the tires are cold meaning the car has been parked for at least three hours or driven less than one mile. Remove the valve cap, press an accurate tire pressure gauge firmly onto the valve stem, and note the reading.
Tread Depth
Federal safety standards set the minimum legal tread depth at 2/32 of an inch. You can confirm your depth at home using a standard penny.
Turn the penny upside down so Lincoln’s head faces down, and slide it directly into a tread groove. If you can see the top of Lincoln’s hair, your tread has worn past 2/32 inch and the tire needs immediate replacement. You can also spot the molded rubber tread wear indicator bars running across the grooves when they sit flush with the surrounding tread.
Sidewalls and Rotation
Run your eyes along the inner and outer sidewalls of each tire for bulges, deep scrapes, or dry rot cracks. A bubble on the sidewall indicates internal cord damage from a curb strike or pothole and can cause an immediate blowout.
Check for uneven wear across the contact patch. Rotating tires evens out wear across front and rear axles; consult your vehicle owner’s manual for your model’s exact rotation mileage interval (commonly every 5,000 to 7,500 miles).
| Symptom | Likely cause | What to do |
| Wear on both outer shoulders | Chronic underinflation | Add air to match door-jamb PSI; inspect for slow rim leaks |
| Wear along center tread strip | Chronic overinflation | Bleed excess pressure down to match factory placard specification |
| Wear on only one inner or outer edge | Wheel alignment out of factory spec | Visit a service center for a computerized wheel alignment |
| Cupping or scalloped dips in rubber | Worn shock absorbers or bent suspension | Have suspension struts and wheel balance inspected by a technician |
| Bulge or bubble on tire sidewall | Damaged internal carcass cords | Replace the tire immediately; do not drive at highway speeds |
Fluids to Check Under the Hood
Your vehicle relies on closed hydraulic and lubricating systems to prevent metal-on-metal friction and heat damage. Checking these reservoirs monthly catches slow leaks before an engine seizes or brakes fade.
Critical Safety Precautions
- Never twist off a hot radiator or expansion tank cap. Pressurized boiling coolant causes severe steam burns; let the vehicle sit until the radiator hose feels cool to the touch.
- Keep fluids away from painted body panels. Brake fluid strips automotive clear coat down to bare metal in minutes.
- Park exclusively on a level surface with the transmission in Park and the emergency brake engaged before checking levels.
Engine Oil
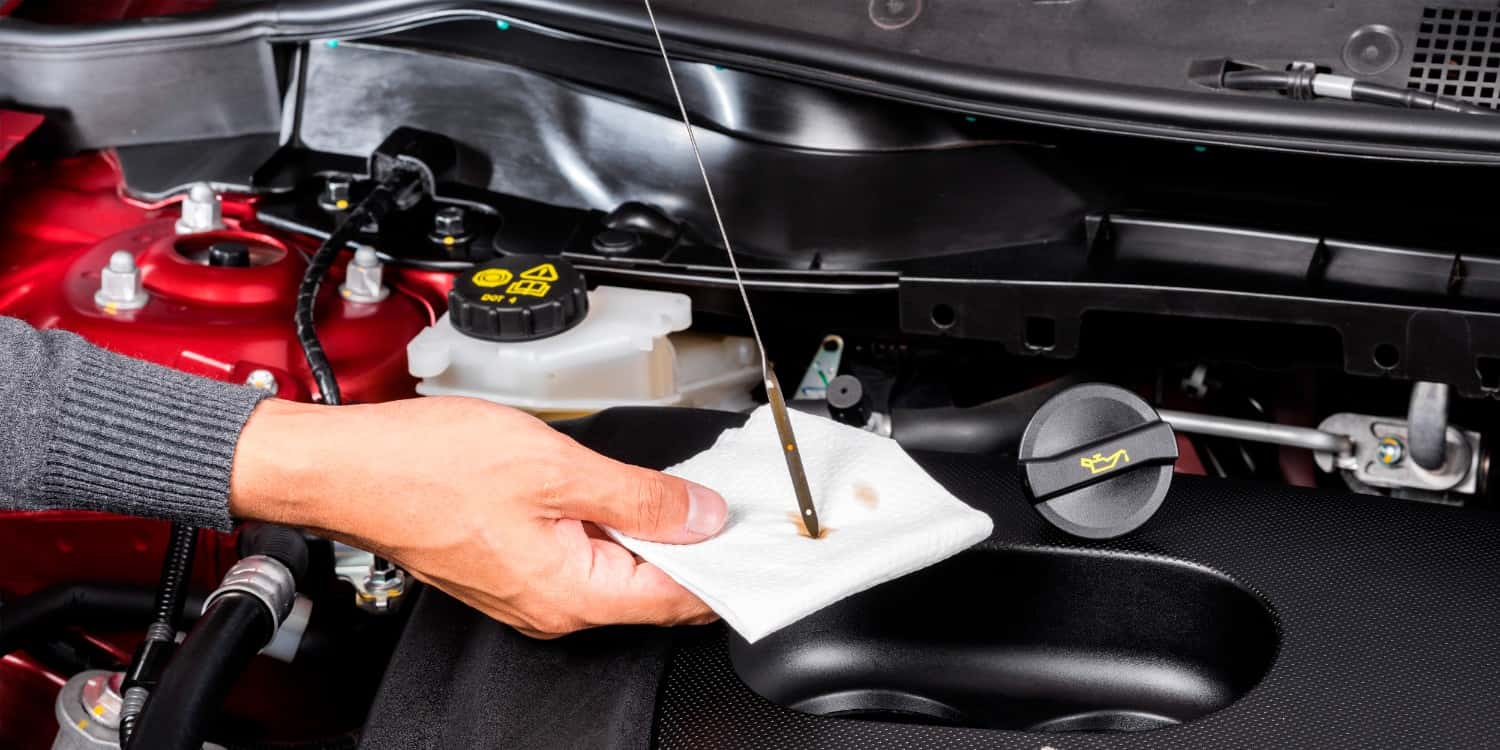
Park on level ground. Most traditional vehicles require checking oil after warming up the engine, turning it off, and waiting five to ten minutes for the lubricant to drain back into the pan. Pull the dipstick, wipe it clean on a rag, push it all the way back in, and withdraw it again.
The oil film must sit comfortably between the minimum and maximum indicator holes or crosshatches. Healthy oil ranges from translucent amber to dark brown. If the fluid sits below the lower hash mark, top it off using the specific oil viscosity grade detailed in your owner’s manual. Note that many newer vehicles eliminate the physical dipstick entirely, relying instead on an electronic gauge inside the digital instrument cluster menu. If the oil appears milky white, smells heavily of raw fuel, or shows metal glitter, stop driving and contact a service advisor immediately.
Coolant
Check the transparent plastic expansion tank with the engine completely cold. The liquid should sit squarely between the molded “MIN” and “MAX” cold-fill lines.
Healthy coolant displays a vibrant green, pink, blue, or orange tint depending on your manufacturer’s formulation. If the reservoir sits bone dry or you smell sweet syrup after parking, you have a cooling system leak that requires professional pressure testing.
Brake Fluid
Locate the translucent brake master cylinder reservoir near the engine bay firewall. You can visually inspect the level right through the plastic side without opening the cap, keeping outside moisture out of the hydraulic system.
Fresh fluid looks nearly clear to light amber. If the fluid drops near the “MIN” line, your brake pads may be worn thin, or a caliper line is leaking. Dark, black fluid indicates moisture contamination and breakdown, meaning it is time for a professional hydraulic system flush.
Washer Fluid
Find the reservoir cap embossed with a windshield wiper and water spray icon. Unlike other systems, you can top this off anytime without risk of mechanical damage.
Fill the bottle with a dedicated automotive washer fluid rather than plain tap water, which leaves calcium scale on internal pump impellers and freezes solid in winter temperatures.
| Fluid | Where to check | Healthy sign | Red flag |
| Engine Oil | Engine bay dipstick or digital cluster menu | Oil level between hash marks; amber to brown hue | Milky sludge, metal flecks, or oil level below minimum line |
| Coolant | Clear plastic expansion tank | Fluid sits between MIN and MAX marks; bright color | Empty tank, brown rust water, or sweet smell |
| Brake Fluid | Master cylinder reservoir on firewall | Clear to pale amber liquid sitting near MAX mark | Dark murky fluid, spongy pedal, or level dropping near MIN |
| Washer Fluid | Tank with wiper/fountain cap icon | Fluid filled within a few inches of reservoir neck | Dry tank, frozen slush, or clogged nozzle spray pattern |
Battery, Belts, Lights and Wipers
These four components control your starting power, engine accessories, and driving visibility. Checking them takes five minutes and keeps routine wear from turning into roadside trouble.
Battery Condition and Age
Inspect the top of the battery case for chalky, crusty blue or white residue around the cable clamps. Corrosion creates electrical resistance, choking off the starter motor.
According to AAA, typical car batteries last three to five years, with extreme summer heat shortening that lifespan down to three years. Find the date code sticker on the case; if the battery is over three years old, have a service center test its cold-cranking amps.
Belts and Hoses
Perform a quick visual check with the engine turned off. Examine the ribbed side of the serpentine belt using a small flashlight.
Look for deep crosswise cracks, frayed edges, or dry rotting. Squeeze the upper and lower radiator hoses with your fingers (only when the engine is cold); replace any hose that feels brittle, excessively soft, or swollen at the clamp necks.
Walk-Around Light Check
Turn on your hazard lights and headlights, then walk around your car. Check low beams, high beams, amber turn indicators, and license plate lights.
Back up toward a garage door or wall to see your red brake lights and reverse lights reflect in your mirrors. A turn signal that blinks twice as fast as normal tells you a bulb has burned out.
Wiper Blades
Lift each wiper arm and slide your thumb along the rubber squeegee edge. The rubber strip should feel supple and remain firmly bonded to the metal or plastic frame.
- Look for torn rubber flaps hanging loose from the blade ends.
- Listen for chattering or skipping across the glass during light rain.
- Watch for wide streaks or blind spots left across your windshield.
| Part | Quick test | Replace or inspect when |
| Battery | Visual check for corrosion; check date sticker | White/blue crust on terminals; battery is 3+ years old |
| Drive Belts | Visual check of rib surface with flashlight | Missing chunks, frayed cord edges, or persistent squealing |
| Radiator Hoses | Cold squeeze test along rubber body | Spongy feel, hardened walls, or bulging near clamp connections |
| Exterior Bulbs | 360-degree walk-around inspection | Dim output, dark housing, or rapid turn signal blink rate |
| Wiper Blades | Run finger down edge; spray washer fluid | Split rubber, metal contact on glass, or wet streaks |
What Your Dashboard Warning Lights Are Telling You
Your instrument cluster acts as an early warning system. Modern vehicles run self-diagnostic checks every time you cycle the ignition, briefly lighting up every icon before turning them off.
Dashboard lights follow a universal stoplight color system: yellow or amber indicates an advisory issue that needs attention soon, while red signals an active mechanical failure requiring immediate action. According to the National Highway Traffic Safety Administration (NHTSA), red warning icons alert drivers to safety-critical system faults that require stopping the vehicle safely.
| Light | Meaning | Can I keep driving? | Next step |
| Check Engine (Steady) | Emissions, fuel, or ignition sensor fault detected | Yes, moderately; avoid heavy towing or hard acceleration | Schedule diagnostic scanning at a certified service center |
| Check Engine (Flashing) | Active engine misfire dumping unburned fuel into exhaust | No; pull over safely and shut off engine | Tow vehicle to prevent catalytic converter destruction |
| Oil Pressure (Red Can) | Critical drop in engine oil pressure | No; turn off engine immediately | Check dipstick level; tow to shop if level is fine or light stays on |
| Coolant Temp (Red Thermometer) | Engine running dangerously above operating temperature | No; pull over and shut down engine right away | Let engine cool fully; check coolant tank; do not open hot radiator |
| Battery / Charging (Red Battery) | Alternator failure or broken accessory drive belt | Short distance only until battery drains completely | Turn off radio and A/C; drive straight to a repair facility |
| Brake System (Red Brake) | Low brake fluid or parking brake engaged | Only if parking brake was on; otherwise, no | Check parking brake; if off, pedal feels soft, call a tow truck |
| TPMS (Amber Horseshoe) | One or more tires dropped below recommended cold PSI | Yes, carefully at reduced speeds | Check pressures with hand gauge; inflate to door-jamb spec |
| ABS (Amber Letters) | Antilock braking assist disabled; standard brakes work | Yes, with cautious braking habits | Normal braking works, but schedule an ABS sensor diagnostic |
Icons and display graphics vary slightly depending on your vehicle’s make, year, and trim level. If an unfamiliar icon stays lit after you crank the engine, reference your owner’s manual directly to identify the exact fault code and manufacturer recommended response.
Car Maintenance Schedule: Monthly, Seasonal and by Mileage
A reliable car maintenance schedule combines your quick monthly routine with deeper scheduled service intervals. Sticking to these timetables protects major mechanical components and preserves warranty coverage.
| Interval | Tasks | Who does it |
| Monthly | Cold tire pressure, tread wear, oil, coolant, washer fluid, lights, wipers | DIY |
| Every 3 Months | Automatic car wash underbody rinse, door latch lubrication, battery terminal check | DIY |
| Every 6 Months | Tire rotation, wiper blade replacement, cabin and engine air filter inspection | DIY or Service Center |
| Yearly | Multi-point mechanical inspection, wheel alignment, brake pad thickness check | Service Center |
| 5,000–7,500 Miles | Engine oil and filter change, tire rotation, chassis lubrication (general reference) | Service Center |
| 15,000–30,000 Miles | Engine air filter, cabin air filter, fuel system additive, brake fluid inspection | Service Center |
| 30,000–60,000 Miles | Transmission fluid check/flush, coolant drain and fill, spark plug evaluation | Service Center |
These mileage markers serve strictly as general industry baselines. Always reference your vehicle’s specific owner’s manual or the Hyundai MyHyundai portal for your model’s factory-mandated schedule. Pay close attention to the “severe usage” schedule if your daily driving includes repeated short trips under five miles, stop-and-go city traffic, heavy trailer towing, dusty dirt roads, or extreme summer heat and winter freezes. Under severe conditions, factory fluid change intervals often drop by half.
What You Can Do Yourself and What Needs a Service Center
Handling basic visual checks yourself saves time and keeps you familiar with your vehicle. However, technical repairs, hydraulic work, and onboard computer diagnostics require specialized lifts, calibrated sensors, and factory-trained technicians.
| DIY (About 15 Minutes) | Leave It to a Technician |
| Checking and adjusting cold tire pressure | Computerized four-wheel alignments |
| Topping off windshield washer fluid | Full engine coolant and transmission fluid flushes |
| Inspecting engine oil level with dipstick | Complete engine oil and filter replacements |
| Checking wiper blades and replacing snap-in inserts | Brake pad, rotor, and hydraulic caliper service |
| Visual walk-around check of all exterior bulbs | High-voltage electrical diagnostics and battery replacement |
| Clearing powdery corrosion off battery terminal clamps | Serpentine belt and timing chain replacements |
| Checking tire tread depth with a penny | Tire mounting, road-force balancing, and patch repairs |
5 Signs to Book Service Now
- Grinding, scraping, or squealing noises when you step on the brake pedal.
- Steering pull or severe vibrations pulling the steering wheel to one side on flat roads.
- Puddles of fluid on the ground showing fresh red, green, or brown fluid under your parking spot.
- Temperature gauge spiking hot or steam rising from under the hood.
- A flashing Check Engine light indicating an active engine misfire.
Keep every receipt, date stamp, and inspection log in your glove box. Documented service records protect resale value when shopping for quality pre-owned vehicles and provide clear proof of care if warranty questions arise always check your vehicle’s warranty manual to verify exact coverage terms.
If your monthly inspection turns up an active leak, worn pads, or a stubborn warning light, schedule an appointment with the factory-certified technicians at the James Hodge Hyundai Service Center to get it sorted out right away.
How We Built This Checklist (and Why You Can Trust It)
This guide reflects real-world insights straight from our service drive, reviewed and backed by our service team here at James Hodge Hyundai. If you ever have questions about unusual vehicle noises or symptoms, you can always contact our service advisors for honest recommendations.
Every checklist item comes from factory service manuals, safety advisories, and decades of collective service-lane experience. We prioritized checks that prevent the most common roadside breakdowns: low fluids, dead batteries, and underinflated tires.
Our recommendations reference standards established by trusted automotive safety and consumer testing organizations:
- National Highway Traffic Safety Administration (NHTSA) for tire safety, tread wear limits, and critical dashboard alerts.
- Hyundai Owners Portal for official vehicle maintenance schedules and severe-driving guidelines.
- AAA for battery life cycle data and roadside breakdown trends.
- Consumer Reports and the Car Care Council for consumer-friendly preventive maintenance routines.
Last updated: October 2026. This guide offers general maintenance education for drivers. Because fluid capacities, system specifications, and intervals vary across vehicle years and trim levels, always treat your printed owner’s manual as the final authority.
| Entity | Fact | Source |
| Minimum Tire Tread Depth | Legally worn out at 2/32-inch groove depth across contact patches | NHTSA |
| Tire Inflation Pressure | Must be checked cold using the driver’s door-jamb placard PSI | NHTSA |
| Car Battery Lifespan | Averages 3 to 5 years, dropping closer to 3 years in extreme summer heat | AAA |
| Severe Driving Interval | Short trips under 5 miles or stop-and-go driving require accelerated service | Hyundai Owner’s Manual |
| Flashing Check Engine Light | Indicates an active cylinder misfire requiring immediate shutdown to prevent catalytic damage | EPA / OBD-II Standards |
Conclusion
Car care does not have to eat up your weekend or drain your savings. Committing fifteen minutes once a month to this simple car maintenance checklist lets you catch low engine oil, soft tires, worn tread, low coolant, and streaky wipers before they leave you stranded. You keep your vehicle safe, protect its trade-in value, and save money down the road.
When your monthly driveway walkthrough reveals an active leak, a spongy brake pedal, or an illuminated instrument cluster warning, let our certified technicians handle the heavy lifting. Schedule service with the team at James Hodge Hyundai, check out our current service specials, or swing by the dealership in Muskogee to keep your vehicle running just like new.
Frequently Asked Questions
What should be on a monthly car maintenance checklist?
A complete monthly car maintenance checklist covers cold tire pressure, tread wear, engine oil level, coolant level, brake fluid, windshield washer fluid, wiper condition, exterior lights, and battery terminal corrosion. Checking these items catches minor wear before it leaves you stranded.
How often should I check my tire pressure?
You should check your tire pressure at least once a month and before every long road trip. Always take readings when the tires are completely cold, using the target PSI listed on your driver’s door-jamb placard rather than the number on the tire sidewall.
How often should I check my engine oil?
You should check your engine oil once every month, as well as before setting out on long highway drives. Pulling the dipstick monthly allows you to spot sudden fluid loss, dark sludge, or fuel contamination long before low oil pressure triggers an engine warning light.
How long does a monthly car check take?
A complete monthly car check takes roughly fifteen to twenty minutes in your driveway. You only need a tire pressure gauge, a clean rag, a penny to measure tread depth, and a flashlight to inspect belts and fluid levels under the hood.
Can I do a car maintenance checklist myself?
Yes, everyday drivers can handle the entire monthly inspection checklist at home without special technical training. You are only performing simple visual inspections and topping off accessible fluids, leaving mechanical repairs, brake jobs, and electronic diagnostics to certified technicians.
What is the difference between a car maintenance checklist and a car maintenance schedule?
A car maintenance checklist is a quick monthly visual inspection you perform at home, while a car maintenance schedule is a timeline of manufacturer-required services based on mileage and calendar intervals. A checklist catches sudden leaks and soft tires; a schedule handles scheduled oil changes, timing belts, and fluid flushes.
What happens if I skip monthly car maintenance?
Skipping monthly checks allows minor wear—such as a slow puncture, sticking brake caliper, or low oil level to escalate into sudden mechanical breakdowns and costly repairs. Catching issues early prevents roadside emergencies and protects major components from premature failure.
How often should a car be serviced if I drive very little?
Vehicles driven low miles still need professional service at least once a year or every six months under manufacturer severe-driving recommendations. Engine oil degrades through time and moisture buildup even while sitting parked, and tires develop flat spots from sitting in one place.
What dashboard lights mean I should stop driving?
You should pull over safely and turn off the engine immediately for a flashing Check Engine light, a red oil pressure can icon, or a red engine coolant temperature symbol. Continuing to drive with these active red warnings can cause catastrophic, irreversible engine damage.
Does regular maintenance affect fuel economy and resale value?
Yes, regular vehicle maintenance directly improves fuel economy and protects your car’s resale value over time. Running properly inflated tires optimizes gas mileage, and having a documented service history gives future buyers proof that the vehicle was maintained to factory standards.
0 comment(s) so far on Car Maintenance Checklist: What to Check Every Month